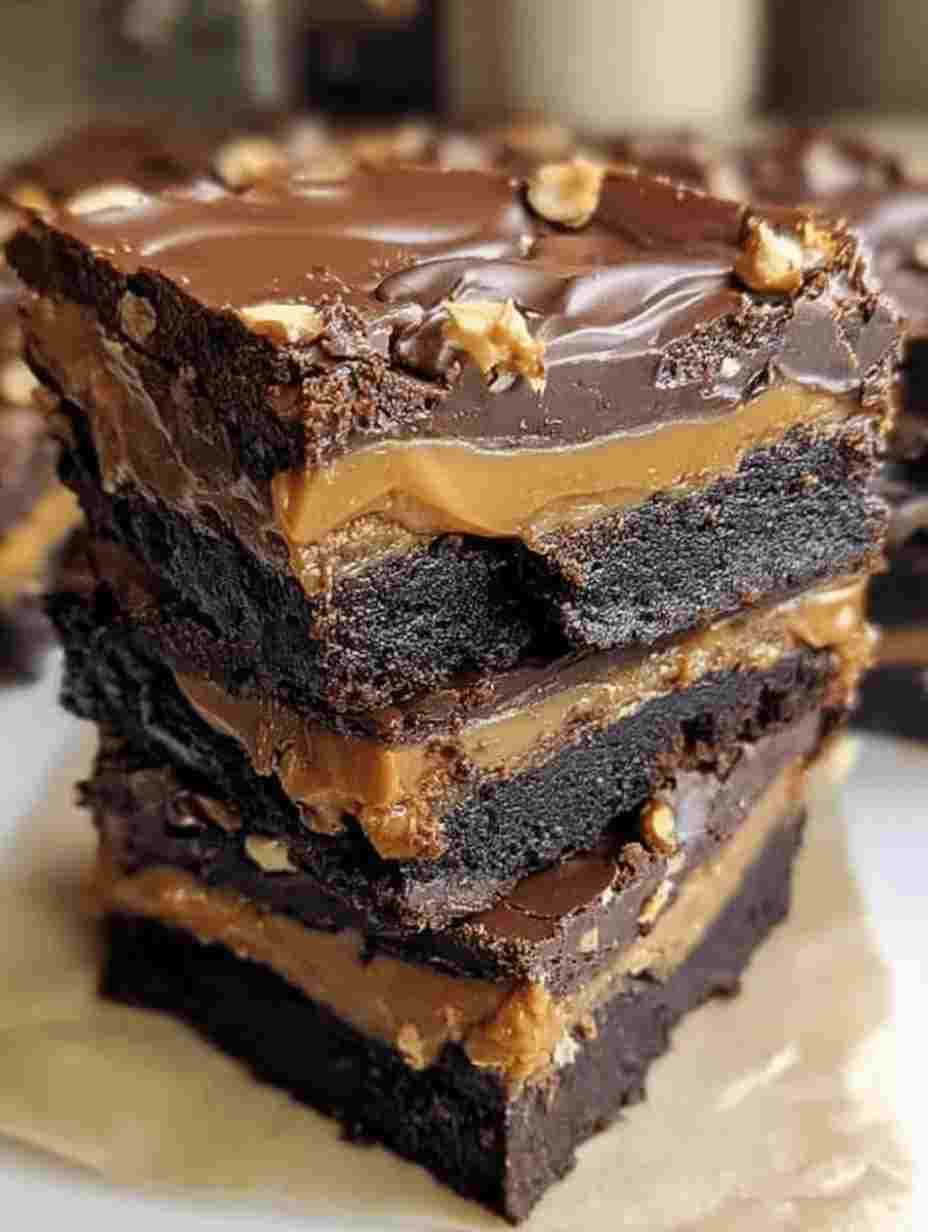
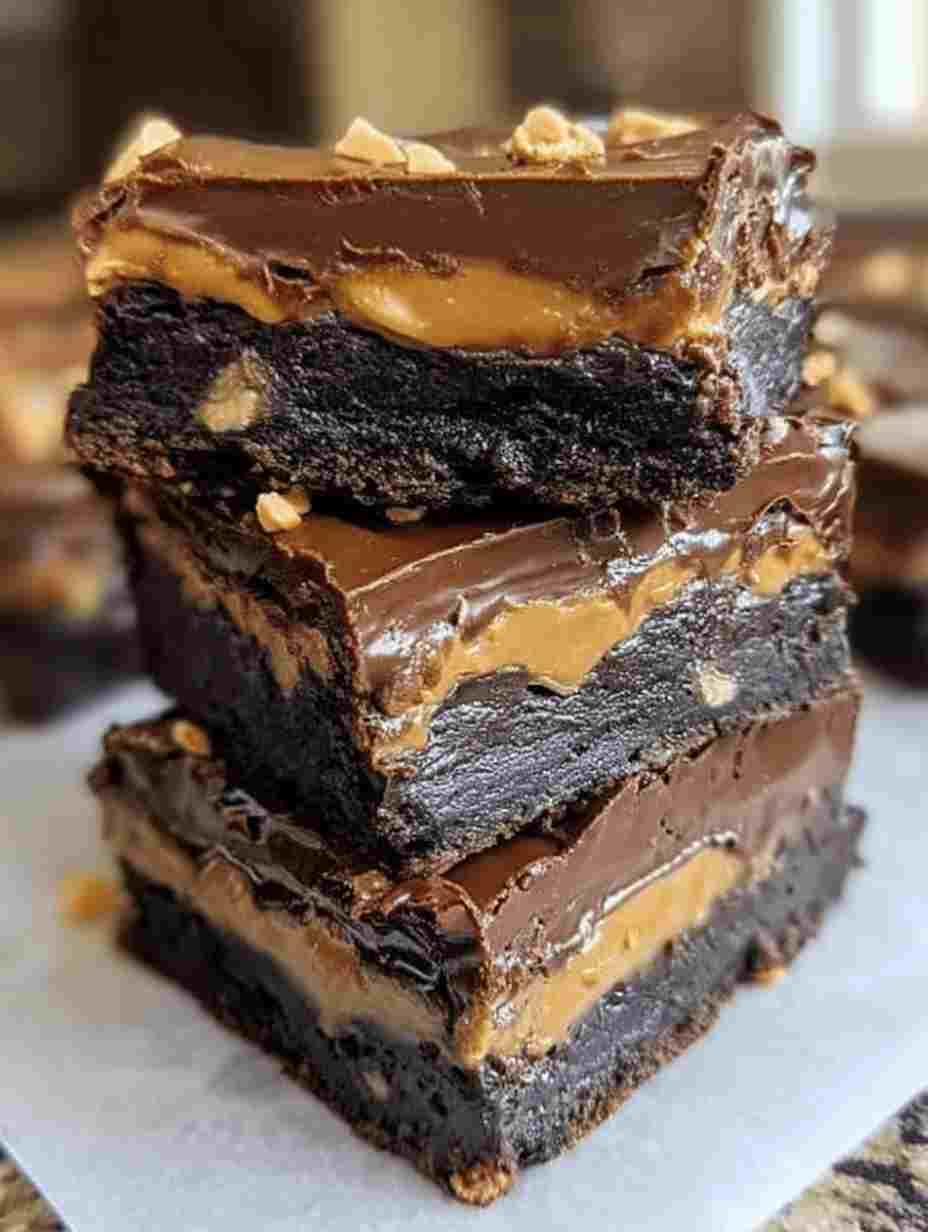
If you’re a fan of the chocolate–peanut butter combo, get ready to fall in love with these Chocolate Peanut Butter Brownie Bars. Imagine a rich, fudgy brownie base, topped with a luscious creamy peanut butter filling, and finished with a smooth chocolate ganache topping. Each bite is decadent, balanced, and utterly irresistible.
These bars are the perfect treat for parties, potlucks, or anytime you need a no-fail dessert that impresses. The layers give a bakery-worthy presentation, while the flavors deliver all the nostalgia of a peanut butter cup wrapped into a chewy brownie bar. Whether you’re craving comfort food desserts or need a crowd-pleaser for your next gathering, these bars will hit the sweet spot.
Why You’ll Love This Recipe
-
Three decadent layers – Fudgy brownie, creamy peanut butter filling, and silky chocolate topping.
-
Better than Reese’s – Tastes like a homemade peanut butter cup in brownie form.
-
Easy to make ahead – These bars set beautifully in the fridge and slice cleanly.
-
Perfect for sharing – Makes a full 9×13 pan, ideal for parties or gatherings.
-
Simple ingredients – Uses pantry staples you likely already have on hand.
Ingredient Breakdown
For the Brownie Layer
-
Unsalted Butter (150g): Provides richness and keeps the brownies moist.
-
Dark Chocolate (200g, chopped): The star of the base, adding depth and indulgence.
-
Granulated Sugar (250g): Sweetens and balances the bitter notes of cocoa.
-
Eggs (3 large): Add structure and a chewy texture.
-
Vanilla Extract (1 tsp): Rounds out the flavor with subtle warmth.
-
Plain Flour (100g): Provides structure without making the brownies cakey.
-
Cocoa Powder (30g): Intensifies the chocolate flavor.
-
Salt (½ tsp): Enhances overall flavor and balances sweetness.
For the Peanut Butter Layer
-
Creamy Peanut Butter (250g): Creates a smooth, nutty filling.
-
Unsalted Butter (60g, softened): Adds creaminess and helps set the layer.
-
Icing Sugar (100g): Sweetens and thickens the filling.
-
Vanilla Extract (1 tsp): Complements the peanut butter flavor.
For the Chocolate Topping
-
Milk Chocolate (200g, chopped): Adds a creamy, sweet finishing layer.
-
Unsalted Butter (60g): Helps the chocolate melt smoothly and slice without cracking.
Pro Tips
-
Don’t overbake the brownies – Pull them when a toothpick comes out with moist crumbs. They’ll continue to firm up as they cool.
-
Cool completely before layering – Spreading the peanut butter mixture on warm brownies can cause melting and uneven layers.
-
Chill between layers – For sharp, bakery-style layers, refrigerate briefly after spreading the peanut butter before adding the chocolate topping.
-
Slice with a hot knife – Dip a sharp knife in hot water, wipe dry, and cut for clean, professional-looking bars.
-
Use quality chocolate – The better the chocolate, the more luxurious your topping will taste.
Ingredient Swaps or Variations
-
Nut Butter Alternatives: Swap peanut butter for almond butter, cashew butter, or even Nutella for a twist.
-
Darker Flavor: Use semi-sweet or dark chocolate instead of milk chocolate for a richer finish.
-
Crunch Factor: Stir chopped peanuts into the peanut butter filling for extra texture.
-
Gluten-Free: Substitute the plain flour with a 1:1 gluten-free baking blend.
-
Mini Bars: Use a mini muffin tin to make bite-sized versions perfect for parties.
Serving Suggestions
These bars are rich enough to stand alone but can be elevated with fun pairings:
-
Serve with a scoop of vanilla ice cream for a brownie-sundae vibe.
-
Add a dollop of whipped cream and a sprinkle of chopped peanuts.
-
Pair with strong coffee or espresso to balance the sweetness.
-
Drizzle extra melted peanut butter over the top for presentation.
Make Ahead + Storage Tips
-
Make Ahead: The bars are best when chilled, making them an ideal make-ahead dessert. Prepare a day in advance and refrigerate overnight.
-
Storage: Keep in an airtight container in the fridge for up to 5 days.
-
Freezing: Wrap bars individually in parchment and freeze in a container for up to 2 months. Thaw in the fridge before serving.
-
Reheating: These bars are designed to be enjoyed chilled or at room temperature—no reheating required.
Cultural or Historical Notes
The love affair between chocolate and peanut butter is a true American classic. Reese’s Peanut Butter Cups, first launched in the 1920s, popularized the pairing and inspired countless desserts. This recipe is a modern homage, layering those flavors with fudgy brownies for an indulgent twist on two timeless sweets.
Frequently Asked Questions (FAQ)
Do I need to use a 9×13 pan?
Yes, this size ensures the perfect balance of layers. Using a smaller pan will make the bars too thick and alter baking time.
Can I use natural peanut butter?
You can, but the texture may be less stable. Creamy processed peanut butter works best for smooth, firm layers.
What’s the best way to cut the bars cleanly?
Use a hot, sharp knife. Dip it in hot water, wipe clean, and slice in one motion for neat edges.
Can I use boxed brownie mix instead?
Yes! If short on time, prepare a boxed brownie mix for the base, then add the peanut butter layer and chocolate topping as directed.
How long do the bars need to chill?
At least 2 hours, but overnight chilling gives the cleanest slices and best texture.
Chocolate Peanut Butter Brownie Bars
Ingredients
Equipment
Method
- Preheat oven to 180°C (350°F). Line a 9x13-inch pan with parchment, leaving overhang for easy removal.
- Melt butter and dark chocolate in saucepan over low heat. Cool slightly. Whisk sugar, eggs, and vanilla in a bowl. Stir in chocolate mixture. Sift in flour, cocoa, and salt. Fold until combined. Spread batter in pan.
- Bake 20–25 minutes until a toothpick comes out with moist crumbs. Cool completely in pan.
- Beat peanut butter, softened butter, icing sugar, and vanilla until creamy. Spread over cooled brownies.
- Melt milk chocolate and butter together in microwave or double boiler. Stir until smooth. Pour over peanut butter layer and spread evenly.
- Refrigerate 2 hours until topping sets. Lift from pan using parchment and cut into bars.